Create a Custom Map with Google Maps
Learn How to Create Custom Maps using Google Maps, Maptive, or Google Maps API.
Creating your own custom map is easier than you think! The most popular method for creating custom maps that most people start with is using the Google Maps website or app. This usually works fine for simple tasks like mapping out a few points or generating a route. However, if you are looking to do any more advanced customization such as mapping hundred or thousands of locations at once or wanting to create more complex routes you will need to look at more advanced mapping solutions. Maptive’s mapping software makes it easy to add and edit mapping data on maps in a snap (in minutes!), build maps using API access and create fully customized maps thank’s to its wide selection of features and tools.
3 Methods for Creating Custom Google Maps
Building a custom map may seem complicated, but it’s actually surprisingly easy. Here are three ways that anyone can create their own custom map:
- Using the Google Maps Website or App.
- Use custom mapping software like Maptive.
- Using the Google Maps Platform API.
The method you choose will depend on your needs, project, and experience.
1. Create Custom Maps using Google Maps
Google Maps allows you to customize maps by adding markers manually or as a group. This method is simple and free, making it a great choice for anyone with limited experience or budget.
Follow the steps below to create a custom map with Google Maps:
Updated January 3, 2022
- Go to the Google My Maps Page
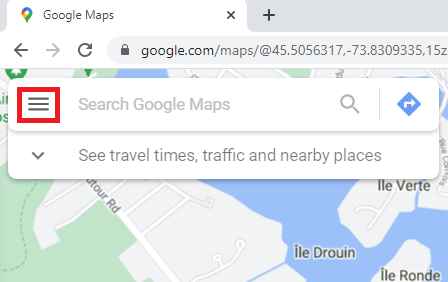
- Click on the Menu icon in the top left-hand corner.
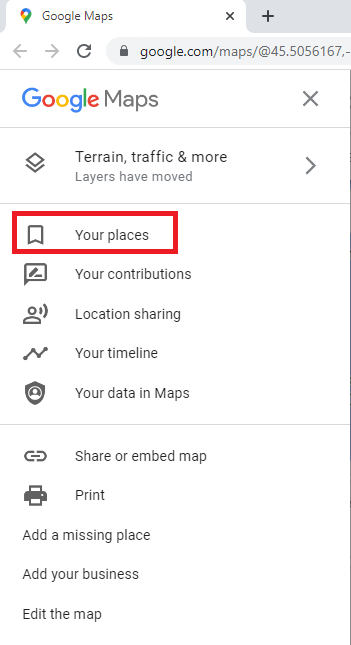
- Click on the “Your Places” option in the menu.
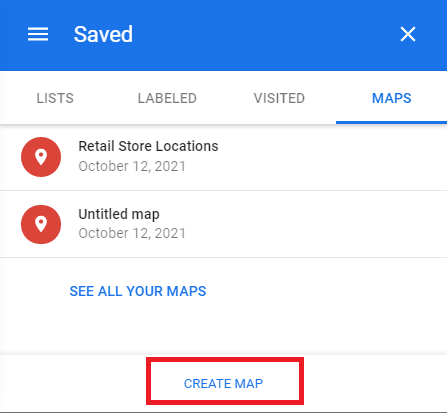
- Click on the “Maps” Tab in the top right.

- Click on the “CREATE MAP” link at the bottom of the menu.
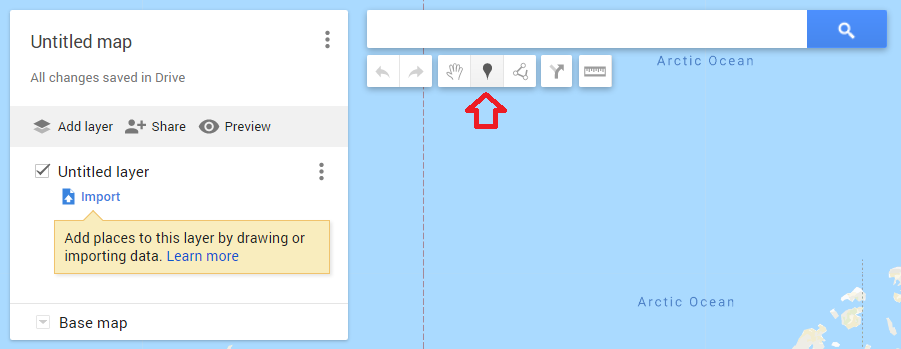
- Once you are on the map creation page, click the marker icon to add a marker to the page.
- Find a place on the map you want to add a marker and click on that location on the map.
- This will place a marker on the map and bring up a box where you can add a name, description, and other attributes to the marker.
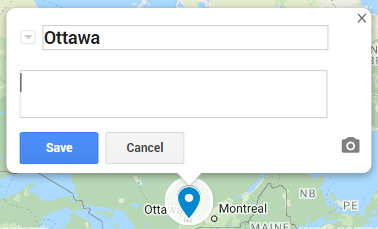
- Repeat the previous 3 steps as many times as needed to add more markers to the map.
- Once you are finished, you can customize your map details in the following ways:
Click on location 1 “Untitled Map” to rename your map.
Click on the 3 dots button in location 2 to rename your layer.
Click on “Share” in location 3 on the image to share your map with others.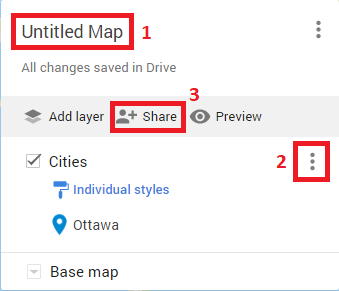
- To Customize the Appearance of your map you can change the base style of the map by clicking on “Base map” and selecting a style:
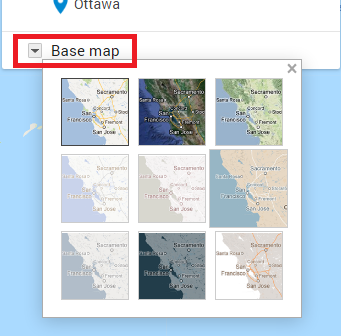
While this is a very cost-effective solution, Google Maps offers very few customization options.
2. Use Mapping Software like Maptive
Maptive is a cloud-based mapping software built on Google maps but with much more customization features. Maptive provides you with a wide array of options to design the perfect custom map for your needs. If you are looking for a mapping solution with more customizable map styles and mapping tools like a heat map generator, radius map tool, geographic boundary territory tool, and multi-stop route planner then this is likely the option for you.
Follow the steps below to create a custom map with Maptive:
- Start a free trial with Maptive.
- Once on your Maptive home page, click on the Create New Map button.

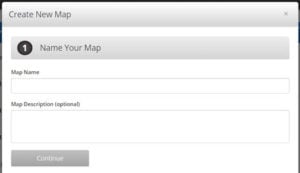
- In the “Create a New Map” popup, name your map, and click continue.
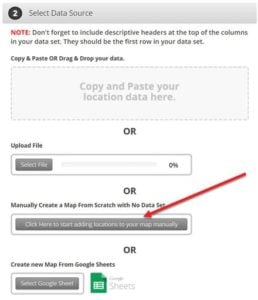
- Our map customizer software allows you to select your data source. You can choose to upload a spreadsheet, copy and paste data, use Google Sheets, or in this example, add markers manually.
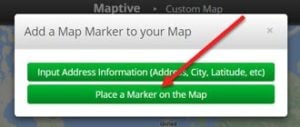
- Then click on the “Place a marker on the map” button.
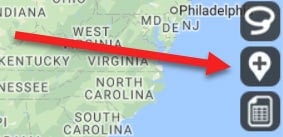
- Then move the map and click on the location you want to place a marker.
- To add more markers click on the “Add a marker to your map” icon and repeat the previous 2 steps.
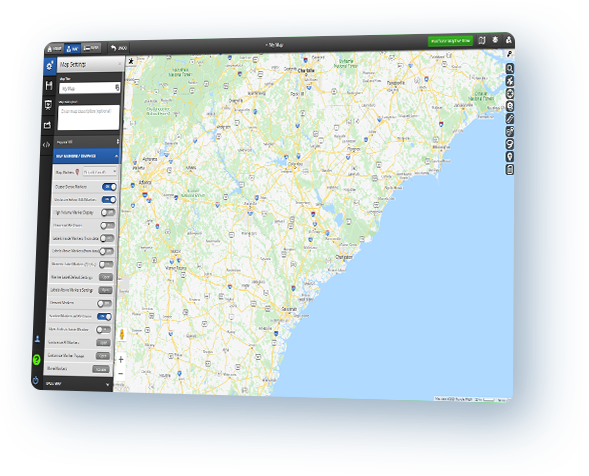
- Once completed, your map might look like the one below. The arrow points to where you can go to share this map, but as you can see there are too many options within Maptive to show on one page. Feel free to play around with a map or visit our features page to read about each individual feature.
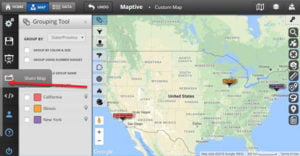
Maptive allows you to create powerful maps with tools and features that include:
- Customizable markers
- Heat Maps
- Drive-Time Tool
- Route Planning with Multiple Stop Support
- Territory Map Tools
- Demographics Data
- Satellite Maps
- Distance Calculator
- Geographic Boundary Tool
- Drawing Tools
- Automated Territory Creation
Check out the Maptive features page for the full list of tools and features.
3. Create a map with the Google Maps API.
Google Maps Platform gives you the ability to create a truly custom map that works exactly how you want it to. This method has the advantage of being the most flexible and is free up to certain limits set by Google. However, it requires programming knowledge to use and can be time-consuming and complicated to build all the features you want. In order to create more than just a basic map, you’ll need some considerable knowledge of HTML, JavaScript and other programming languages.
You can find a tutorial on creating a simple map with a marker using the Google Maps Javascript API here.
What’s the Best Method for Creating Custom Maps?
The answer to this question really depends on your needs.
If you need a map with limited functionality, you can use the Google Maps website. However, if you need an easy way to customize your map with a wide array of features, then you’ll be much better off using a mapping software suite like Maptive.
To learn more about all of the features include with a Maptive subscription click here.